Peanut Butter and Jelly Sourdough Bread
Introduction
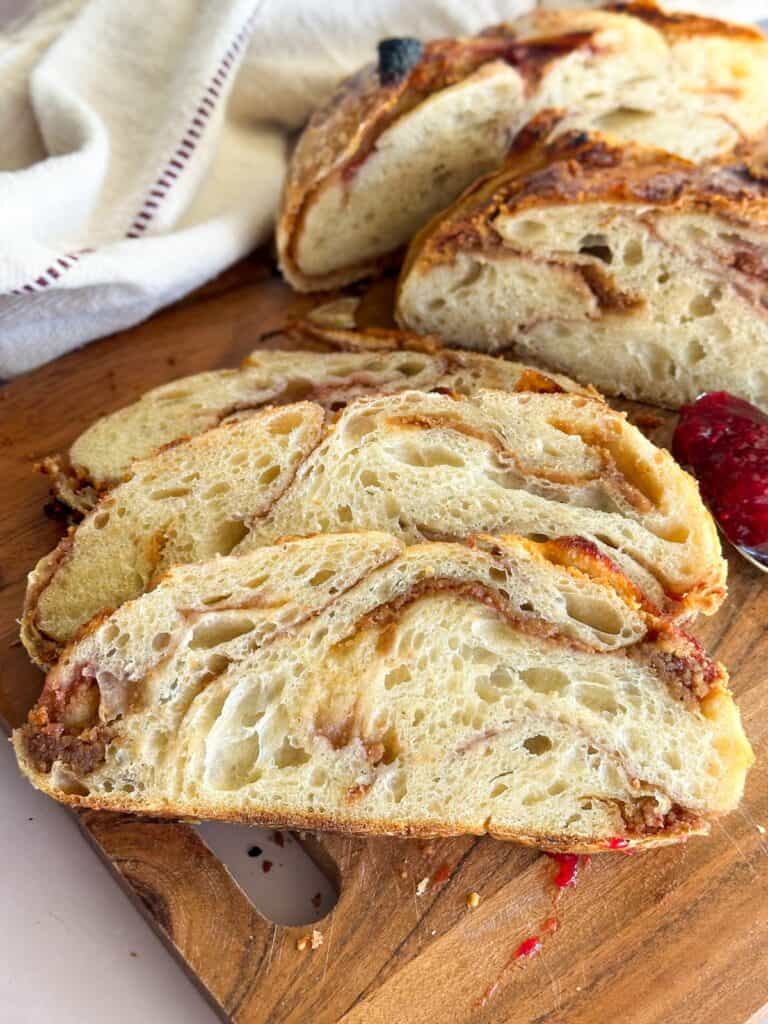
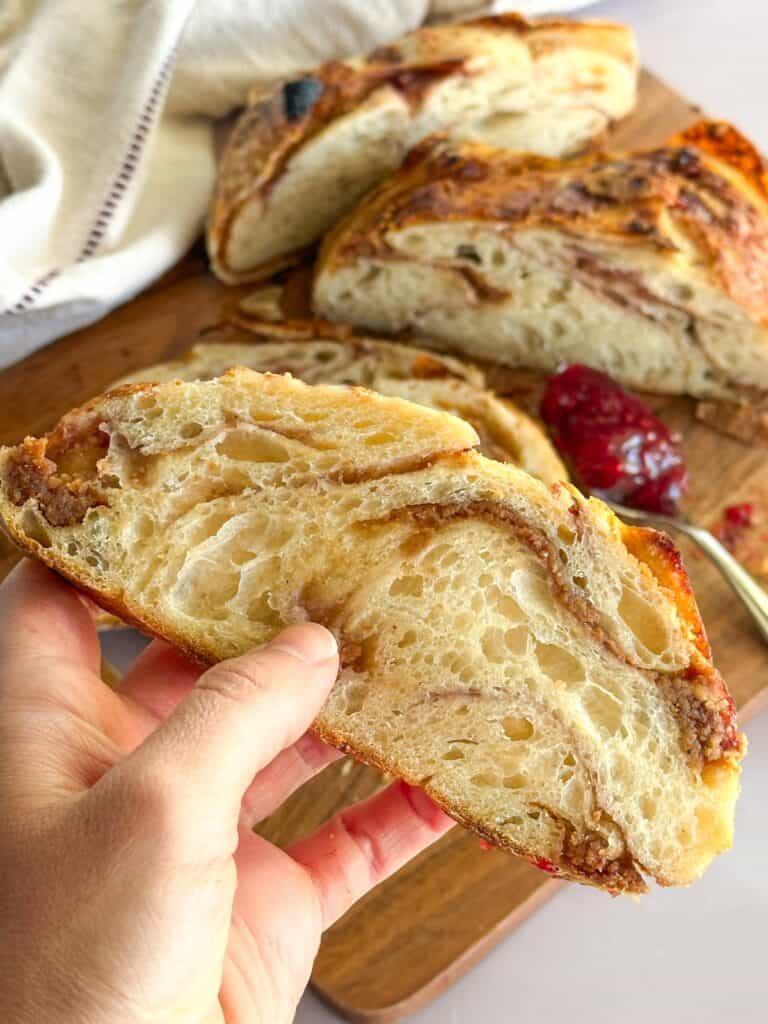
If your kids are anything like mine, peanut butter and jelly is basically its own food group. So naturally, I had to turn it into sourdough bread—and the result is just as fun (and delicious) as it sounds. This peanut butter and jelly sourdough bread is soft, slightly sweet, and layered with that nostalgic PB&J flavor we all know and love.
It’s a playful twist on a classic loaf, but still grounded in good sourdough technique. If you’re newer to baking, I recommend starting with my basic sourdough bread recipe to get comfortable with the process before trying this one. And if you’re just getting started altogether, be sure to check out my guide on how to make a sourdough starter.
Why You’ll Love This Recipe
There are a lot of reasons this peanut butter and jelly sourdough bread is going to become a repeat bake in your kitchen:
- Kid-approved – If your kids love PB&J sandwiches, this is an easy win. It feels familiar but a little more special.
- Great for busy families – Serve it for breakfast, slice it fresh for an after-school snack, or pack it in lunches.
- Naturally fermented – You get all the benefits of sourdough while still keeping things fun and approachable.
- Freezer-friendly – Make a loaf (or two) ahead of time and have an easy snack ready to go.
- Pairs well with other homemade snacks – If you’re building a rotation of kid-friendly options, my sourdough goldfish and sourdough graham crackers are also great to have on hand.
Ingredients
Here’s what you’ll need to make this peanut butter and jelly sourdough bread:
- Bread flour: You can also use all purpose flour. Bread flour will usually result in a better oven spring but all purpose flour will yield good results as well.
- Water
- Active sourdough starter*
- Salt
- Peanut butter: I like natural crunchy peanut butter but you can also use smooth peanut butter. Feel free to substitute sunflower seed butter if your children have a nut allergy or go to a nut-free school.
- Jelly or jam (strawberry or grape are classics, but use what your family loves)
*Tip: If you’re unsure about starter readiness, head over to my post on how to maintain a sourdough starter for a full breakdown.
How to Make Sourdough Peanut Butter and Jelly Bread
Mix your dough
Start by mixing your flour, salt, water, and sourdough starter until it forms a cohesive dough (about 3 minutes). Cover and let rest for 20 minutes.
Perform Stretch and Folds
Now it’s time for stretch and folds. Gently grab one edge of the dough, lift and fold it over itself. Rotate the bowl 1/4 turn and repeat the process until you make a complete turn around the bowl.
Complete a total of 3 sets every 20 minutes. When you finished your stretch and folds, cover the bowl and let rest for bulk fermentation.
Bulk Fermentation
Bulk fermentation is not an exact time. It can take anywhere from 5-12 hours depending on the temperature of your home and the activity of your starter. Your total time will be less in warmer months and longer in colder months. Look for signs of completion. The dough will rise and increase in size by about 50%. It will appear dome shaped and have bubbles on the surface. It should pull away from the side of the bowl when finished.
Shape and Add Filling
Spread the dough out into an approximate square. Spread the dough with about 2/3 of the peanut butter, then 2/3 of the jelly. Roll the dough up into a cylinder and then spread the remaining 1/3 of the peanut butter and jelly on the seam side of the dough before rolling it up in to a a ball.
Turn the dough over, seam side down, and gently pull and twist it towards you 1-2 times to form a tighter ball.
Cold Proof
Transfer your dough into a lightly floured banneton and cover. Let it proof in the fridge for about 1 hour while the oven is preheating.
Typically, I recommend an overnight cold fermentation but certain inclusions (like jam or jelly) can draw water into the dough and create a soggy mess. You can try a longer cold fermentation but it just might make the bread a bit more tricky to work with.
Bake
Bake in a preheated Dutch oven for 15 minutes with the lid on. Remove the lid and drop the temperature to 425F. Bake for an additional 15-20 minutes or until the crust is a deep golden brown. Let it cool completely before slicing (this part is hard, I know).
Jessica’s Notes
I have a trick I always recommend to prevent a thick burnt bottom crust:
After you remove the lid of your dutch oven for the second half of your bake, place a trivet under the bread (be careful not to burn yourself!) This puts space between the bottom of the bread and the hot dutch oven so the bottom crust doesn’t get too thick.
Jessica’s Note
We all love toast, but this bread should not be put in a standard toaster. The jelly and peanut butter can melt and cause a fire. Feel free to warm in a skillet or toast on a baking sheet in the oven or toaster oven.
How to Store
Because of the jelly I recommend storing this bread in the refrigerator to prevent spoilage and mold growth. This bread can be stored for 5-7 days in a gallon ziplock container.
To store in the freezer, slice the loaf and freeze for up to 3 months for best results. Warm the slices straight from frozen for a quick breakfast or snack..
I hope you enjoy this recipe! If you’re looking to build out a lineup of homemade, kid-friendly snacks, this peanut butter and jelly sourdough bread is a great place to start. Pair it with some of our other popular recipes like my sourdough pretzel bites or my sourdough discard oreos. You’ll always have something wholesome (and exciting) on hand.
Let me know if you try it—I love seeing how these fun twists on sourdough turn out in your kitchens!

Peanut Butter and Jelly Sourdough Bread
Ingredients
Dough
- 300 g all purpose flour
- 210 g water
- 7 g salt
- 50 g sourdough starter bubbly and active (see note 1)
Inclusions
- 100 g peanut butter softened (see note 2)
- 80 g jam such as grape, raspberry or strawberry
Instructions
- In a medium bowl, mix all the dough ingredients (flour, water, salt and sourdough starter) using a bread whisk or a rubber spatula. Mix the dough for 3 minutes. Cover and allow to rest for 20 minutes.
- Perform a set of stretch and folds by grabbing the edge of the dough, lifting it until you feel maximum tension, and then folding it over on itself. Turn the bowl ¼ turn. Repeat this process until you have performed 4 sets of stretch and folds and completed a full turn around the bowl. Cover and let rest another 20 minutes.
- Perform 3 more sets of stretch and folds every 20-30 minutes.
- Once you have completed your stretch and folds, cover the bowl and allow to rest on your counter for bulk fermentation for about 5-10 hours.*Note that there is no exact time for this process. The temperature of your home and the temperature of your dough will largely contribute to the time it takes to complete bulk fermentation. In colder months, your dough will take longer to ferment, and in warmer months, it will be faster.When completed, your dough should increase in size by about 50-75%. The dough should appear dome-shaped and will slightly pull away from the edge of the bowl. You will notice the dough has multiple bubbles on the surface and appears light and fluffy.
- Once bulk fermentation is complete, turn your dough on a clean, lightly floured surface. Gently spread the dough out to form a large square. Spread about ⅔ of the peanut butter over the dough, then spread ⅔ of the jam or jelly on top.
- Roll the dough into cylinder.
- Spread the remaining 1/3 of the peanut butter and jelly over the top of the dough over the seam, then roll it up towards you to form a ball.
- Place the dough seam side down on the counter. Gently pull and twist the dough toward you on the counter to build some tension on the surface of the dough. Only do this 1-2 times to prevent the surface from breaking.
- Place the dough seam side up in a lightly floured banneton. Cover and refrigerate 1 hour.
- While the dough is resting in the fridge, preheat the oven to 450℉ with a 5 quart or larger dutch oven inside.
- Once preheated, remove the bread from the fridge and transfer it to a piece of parchment paper. Make a deep score in an X shape over the top of your bread. Transfer the bread to the preheated dutch oven, cover and bake for 15 minutes. After the 15 minutes is up, remove the lid and bake for an additional 15-20 minutes or until the crust is a deep golden brown. When done, remove the bread and transfer to a wire rack to cool completely before slicing.


Can I use a regular loaf pan with a lid instead of a dutch oven?
Hi Jenn, I think it should work but I have not tried this. Let me know how it goes!