Rosemary Sourdough Bread
Rosemary sourdough bread is the perfect beginner sourdough inclusion recipe. The addition of fragrant herbs creates a bread that works great on its own, or in savory sandwiches.

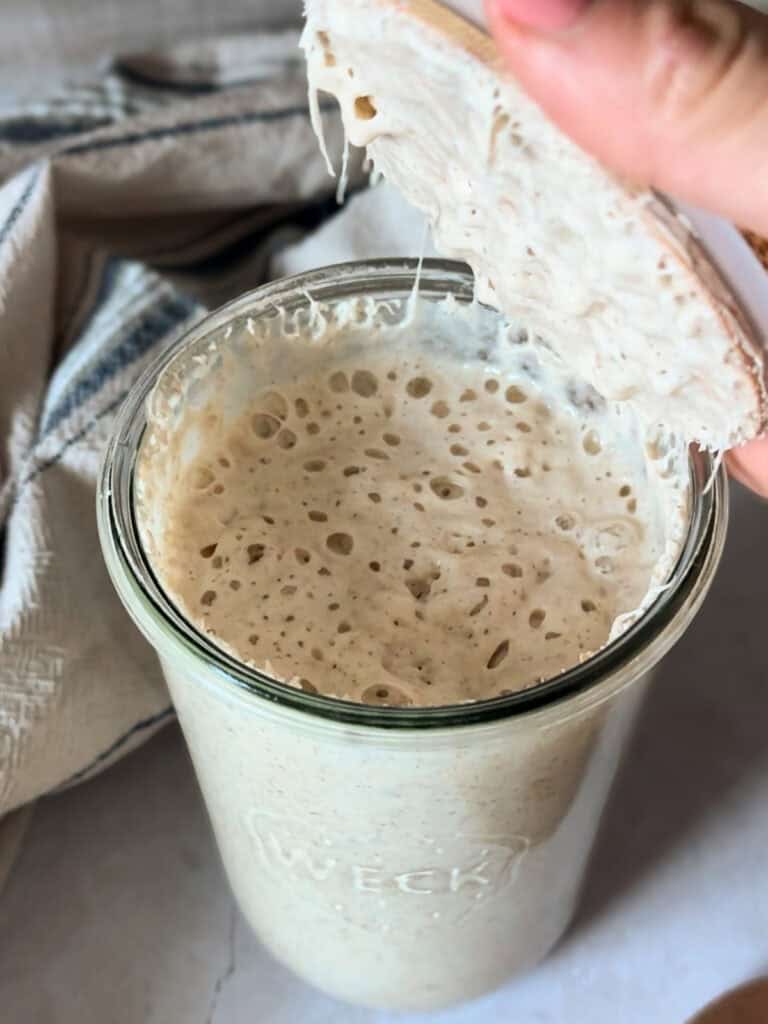
Is My Sourdough Starter Ready to Bake With?
The most important factor that will determine the success of your sourdough bread is the health of your starter. If you regularly feed your sourdough starter, it is probably healthy enough to feed it once before baking.
If your starter has been on the counter for several days or in the fridge for weeks without a feed, I recommend feeding it 2-3 times before baking it. For more information, I have a whole post dedicated to tips to maintain a healthy starter.
Ingredients and Substitutions
The great thing about bread is that it only requires a few very basic ingredients:
- Flour: You can use all purpose flour or bread flour in this recipe. If you are new to baking bread, I recommend using bread flour. Bread flour has a higher protein content that makes it easier to develop a good structure in your bread.
- Water: Ideally, use filtered water for sourdough baking. This has less chemicals that may inhibit the growth of your starter.
- Sourdough starter: Make sure your starter is well maintained. If your starter has been in the fridge for weeks or sitting on the counter for several days without feeding it, you may need to feed it several times before it is ready to bake with.
- Salt: You can use any kind of salt such as table salt, kosher salt, or sea salt.
- Rosemary: I highly recommend only using fresh rosemary in this recipe. Dried rosemary is often very tough and woody. If you choose to use dried rosemary, soak it in water before adding it to the recipe. This will soften the needles a bit.
How to Make Rosemary Sourdough Bread
Before starting, please read the notes above about knowing your starter is ready to bake with. The following instructions provides a sample schedule. You may use this to help give you an idea of when to perform each step. Feel free to adjust this to suit your needs.
The Night Before
8:00 PM: Feed your starter. In a medium jar, combine 25 grams of sourdough starter with 50 grams each of water and flour. Mix well, then cover with a lid or plastic wrap. Allow the starter to rise overnight.
The Next Morning
8:00 AM: In a large mixing bowl, mix together the flour, salt, chopped rosemary, 100 g of sourdough starter, and the water. Mix until a shaggy dough forms and you have no loose flour on the bottom of the bowl. You can do this with your hands, in a stand mixer fitted with the dough hook on low speed, or with a bread whisk. Cover and let rest for 30 minutes.

8:30 AM: Perform your first set of stretch and folds. To do so, grab one edge of your dough then gently stretch it up until you feel tension and cannot easily stretch it anymore. Fold the dough over itself. Turn your bowl 1/4 turn and repeat. Do this two more times for a full rotation.


9:00 AM: Perform your second set of stretch and folds.
9:30 AM: Perform a third set of stretch and folds. This final set is optional.
Once you have completed your final set of stretch and folds, cover the bowl with a damp towel or plastic wrap and set aside. This is the start bulk fermentation.
Bulk fermentation
Bulk fermentation is also known as the proofing time. It refers to the time that the dough is left to rest and rise. You do not need to do anything to the bread at this point, other than check it here and there to see if it is ready to shape. This will take approximately 5-7 hours to complete.
When your bread is finished bulk fermenting, it should appear dome shaped with several large bubbles on the surface. The dough will also jiggle like jello when the bowl is gently shaken.
Many people also look for a percent that the dough has risen. I find this to be somewhat unreliable unless you use a special type of container that allows you to measure the rise. That being said, your dough will generally appear larger and at least 50% bigger than when it started.

Shape the Dough
Once your dough has completed bulk fermentation, it is time to shape the dough.
Dump the dough onto a lightly floured work surface. Stretch the dough into a rough square measuring approximately 12 inches in length.

Fold the dough into thirds, as if folding a sheet of paper in an envelope. Then, grab one of the short ends of the dough and roll the dough towards you to form a rough ball.


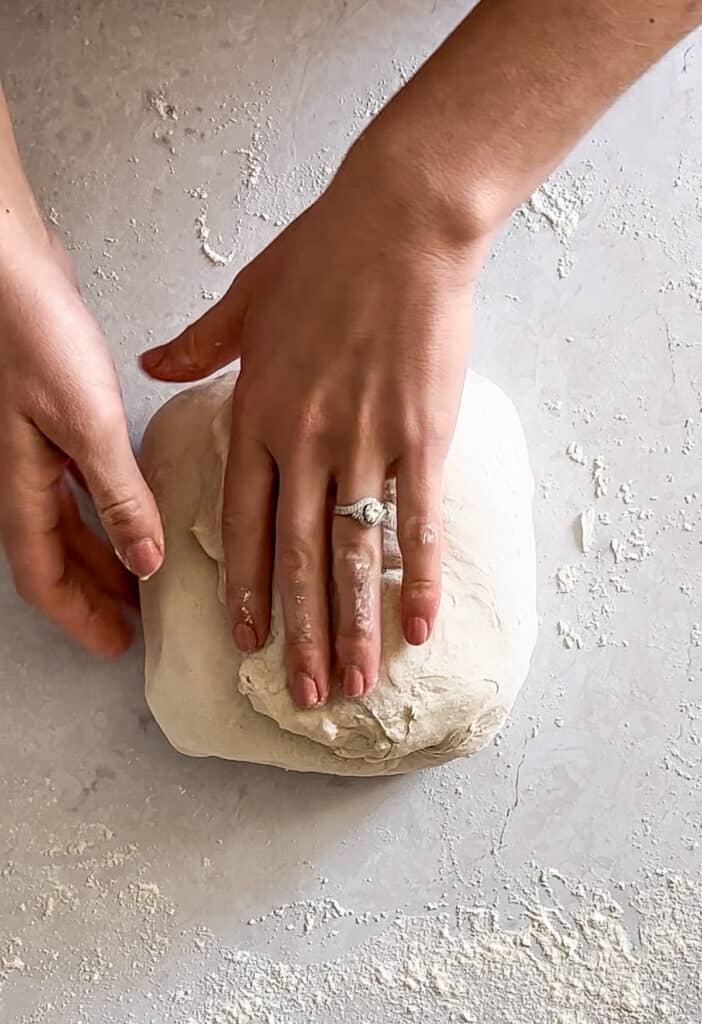
Place the dough seam side down on the counter. Gently pull and twist the dough towards you several times. This creates tension on the surface of the dough and should result in a smooth, tight ball.

Place the dough, seam side up, in a lightly floured banneton or a bowl lined with a lint free towel. Cover with a damp cloth or plastic wrap.
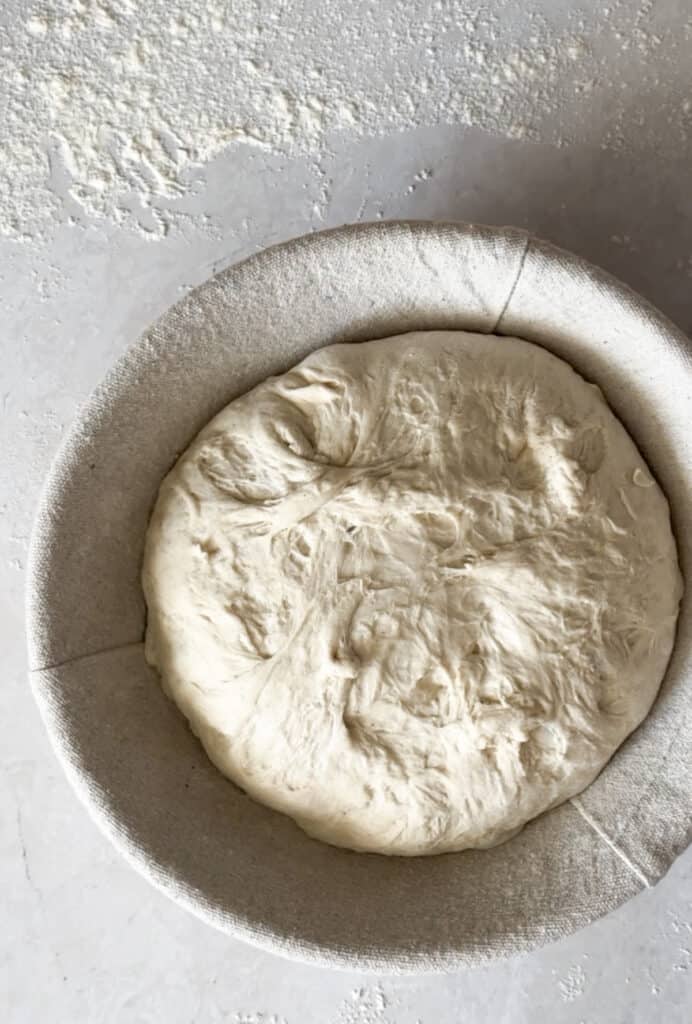
Cold Fermentation
Place the bowl in the refrigerator. This starts the cold fermentation. I recommend refrigerating your dough for at least one hour or up to 72 hours. The bread will continue to ferment and develop a more sour and complex flavor.
If you are short on time, skip the cold fermentation. You can actually bake your sourdough bread immediately after shaping it.
Score and Bake


- When you are ready to bake your rosemary sourdough bread, place a 5 quart (or larger) dutch oven in your cold oven. Preheat the oven to 450F.
- While the oven is preheating, you will score your bread. Sourdough scoring can be as simple as making a single cut on the top of your bread or creating intricate designs.
- For beginners, I recommend a simple score in which you make an X on the dough. To do this, start by placing your dough seam side down on a square of parchment paper. Use a sharp knife or bread lame to make a shallow cut in an X pattern on the dough. Start from one edge of the dough, just where it makes contact with the counter, to the other edge.
- Once your oven is preheated, remove the dutch oven. Remove the lid from your dutch oven (careful, it will be hot!). Pick up the dough by the parchment paper and place it, paper and all, into the dutch oven. Return the lid, then return the dutch oven to the preheated oven.
- Bake for 7 minutes, then remove the bread and slightly deepen the score with your sharp knife. This will help the bread to rise up better. Return the bread to the dutch oven, cover, and return to the oven. Bake for another 10 minutes.
- Remove the lid from dutch oven after the 10 minutes is up. Bake for another 15-20 minutes, or until the bread is a deep golden brown color.
- When your bread is done baking, remove it from the dutch oven and transfer to a wire cooling rack. Allow the rosemary bread to cool before slicing.

How to Store Sourdough Rosemary Bread
I recommend storing this bread in a gallon ziplock bag. It can be stored on the counter for several days, however I recommend storing it in the fridge if you expect it to last longer than 3-4 days. This will prevent the bread from becoming moldy. Also, store it away from fresh produce on the counter as this can make it more likely to develop mold.

Rosemary Sourdough Bread
Ingredients
- 500 g bread flour
- 12 g salt
- 1 sprig rosemary large stem removed and finely chopped
- 350 g water
- 100 g sourdough starter bubbly and active, see Note
Instructions
The Night Before: Feed Your Starter
- Feed 25 grams of starter with 50 grams of four, and 50 grams of water. Cover, and let rise overnight.
The Next Morning: Prepare the Dough
- In a large mixing bowl, whisk together the flour, salt and chopped rosemary.
- In a separate medium bowl, whisk together 100 grams of bubbly sourdough starter and the water.
- Pour the water and starter mixture over the flour mixture. Use a rubber spatula or dough whisk to mix the dough until a shaggy dough is formed and no loose flour remains.
- Cover the bowl with a damp towel or plastic wrap. Let rest for 30 minutes.
- Perform your 1st set of stretch and folds: Grab one edge of the dough and gently pull it up until you feel resistance. Fold the dough over itself. Turn the bowl 1/4 turn, then perform another stretch and fold. Continue to do this two more times to complete a full rotation around the bowl.
- Cover the bowl again and let rest.
- Over the next 2 hours, perform 2-3 more sets of stretch and folds. Space each fold at least 20 minutes apart (ideally every 20-40 minutes).
- After your last set of stretch and folds, cover the bowl to prepare for bulk fermentation. When bulk fermentation is complete, the dough will appear increased in size by about 50%. The top will have several large bubbles and will appear dome-shaped. This will typically take 4-8 hours to complete. (See notes in post for additional signs to look for when bulk fermentation is complete)>
Shape the Dough
- Gently dump the dough onto a lightly floured work surface. If the dough sticks to the bowl, gently loosen and scrape the dough with your hand.
- Stretch the dough into an approximate square. Fold the dough into thirds by grabbing one edge and folding ⅓ of the way across the dough. Repeat this process on the other side as if you are folding a letter for an envelope.
- Grab the short end of the dough and roll it towards you to form a rough ball.
- Place the dough ball seam side down on your work surface and gently slide and twist it towards you several times. The dough will tighten and the surface will develop tension as you do this.
Cold Fermentation
- Place the dough seam side up in a lightly floured banneton or a bowl lined with a cotton lint-free towel. Cover with a damp towel or plastic wrap and place in the refrigerator.
- Chill the dough at least one hour or up to 72 hours. The longer you ferment the dough in the fridge, the more of a sour flavor it will develop.
Score and Bake
- Place a 5 qt (or larger) dutch oven in your oven. Preheat the oven to 450℉. This will preheat the dutch oven so it is hot when you place your bread in.
- Place a square of parchment paper on your work surface. Gently flip the dough from the banneton onto the center of the paper.
- Use a bread lame or sharp knife to make a shallow X shape across the bread. Make sure your score the bread from edge to edge (where the bread makes contact with the counter).
- Pick up the scored dough using the corners of the parchment paper. Place the bread and parchment into the dutch oven. The lid of the dutch oven will be hot so use an oven mitt to handle the lid.
- Replace the lid of the dutch oven and place in the preheated oven. Bake for 7 minutes.
- After the 7 minutes are up, remove the bread from the oven. Score the bread deeper along the same X pattern you scored it with earlier. This will allow for greater expansion of the bread. Return to the dutch oven, replace the lid and return to the oven. Bake for another 10 minutes.
- After the 10 minutes are up, remove the lid and bake fore another 15-20 minutes. The crust should appear deep golden brown when done.
- Remove the bread from the dutch oven immediately and transfer to a wire rack to cool completely.


It’s everyone’s favorite!
My go to sourdough